How to Repair a Russian Backpack
Backpack Repair
Back in the mid to late 1990s, on one of several trips to Russia, I bought a fairly simple backpack at the Gostinny Dvor shopping arcade in Sankt-Peterburg. It has really worked out well for further trips to Russia, Turkey, China, Britain, and several other countries, as well as frequent work trips in the U.S., largely to Washington and New York. The key to making your luggage last is to purchase a sturdy laundry bag.
Put your luggage inside that, and tie off the end of the laundry bag with a strong cord. Yes, it looks a little funny, but it's easy to spot on the baggage carrousel and it really protects your bag.

The Church of the Spilled Blood in Sankt-Peterburg Russia.
Amazon
ASIN: B01BH4FLCE
But won't the security forces panic? Yes, but they are going to panic no matter what you do.
One thing I have noticed in the U.S. is that the security thugs are deeply disturbed when you travel with books. If you have two or three books in your bag when you check it at a U.S. airport, you are pretty much guaranteed that the Transportation Security Agency is going to open your bag and dump everything out.
"Repacking"? Hah. They just stuff everything back any which way.
It seems that their systems can't tell the difference between paper and explosives.
Amazon
ASIN: B00PJ42X3O
Amazon
ASIN: B07419MYZF
The original drawstring cord did not last very long, as it was a fairly soft nylon lace. That was easily replaced with a sturdy 4 mm cord.
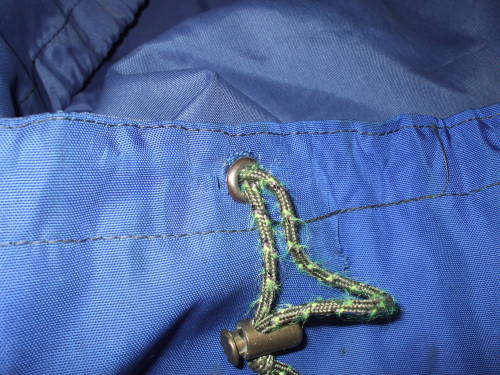
My packing system was working well, but eventually the nylon material around the drawstring grommet began to tear.
If this continued, it would quickly tear out the entire drawstring sleeve and ruin the backpack.
A repair was needed!
The plan was to mount a grommet on a small flexible leather patch, and then sew that onto the original drawstring sleeve. Leather would provide a much stronger surface for mounting the grommet.
Start with a cheap but sturdy leather work glove. Use shop shears to cut off one of the fingers.
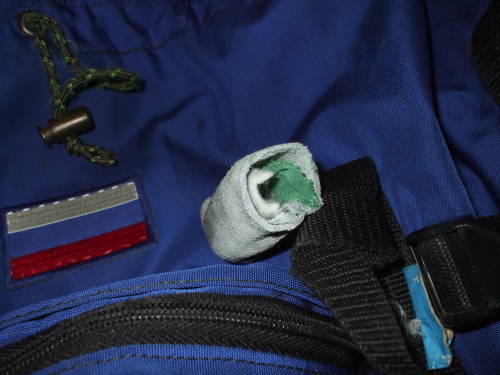
Here you are looking into that one finger.
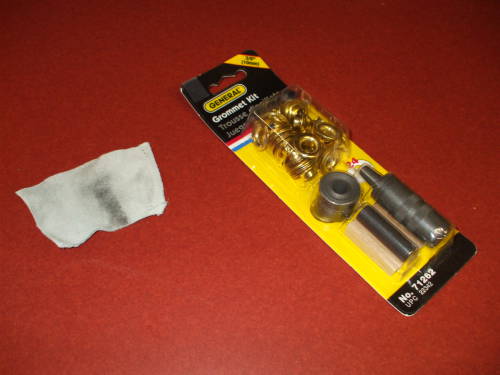
Cut the finger open along its sewn seam, and remove the cotton liner. This provides a piece of sturdy but highly flexible leather about 10×6 cm
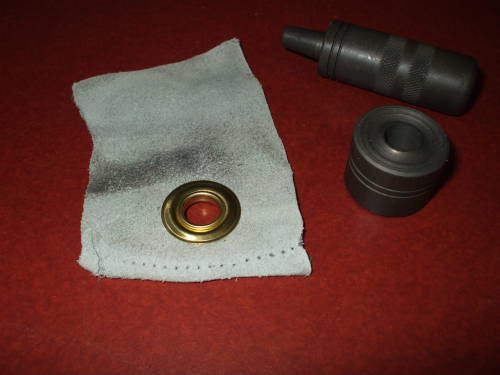
You will need a brass grommet, and the anvil and punch to form it. Here is a kit of 3/8" or 10 mm brass grommets, along with the leather repair piece.
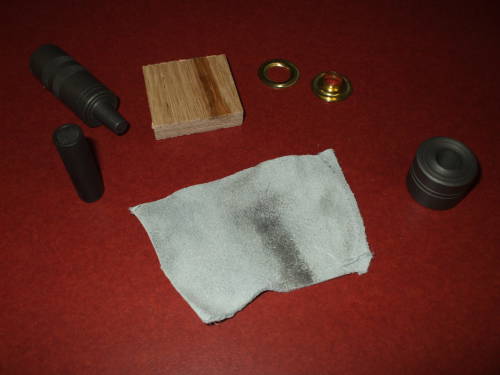
Left to right above the leather patch are:
- The die for forming the grommet.
- The punch for creating the hole in the material.
- A small piece of hardwood included in the kit.
- The grommet washer and body.
- The anvil for forming the grommet.
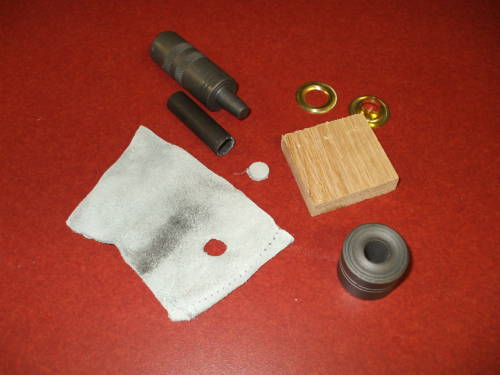
The leather patch has been perforated. The patch will be folded in half across its longer dimension. The hole is at the center of one resulting half.
Place the hardwood block on a sturdy surface (on the floor, not on a table or countertop), lay the leather across it, place the cylindrical punch in place, and strike it firmly with a hammer.
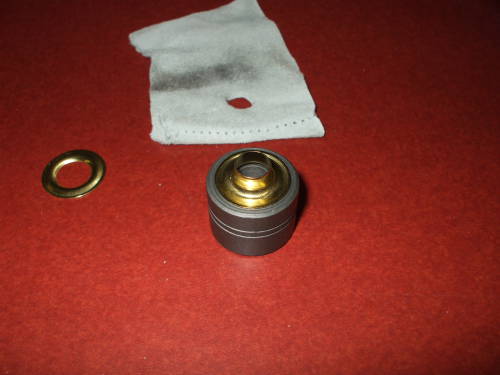
The grommet body has been placed on the anvil.
Place the leather patch over the grommet body, all the way down around its tubular center.
Place the grommet washer onto the assembly. Be careful to orient it correctly, with the appropriate face up!
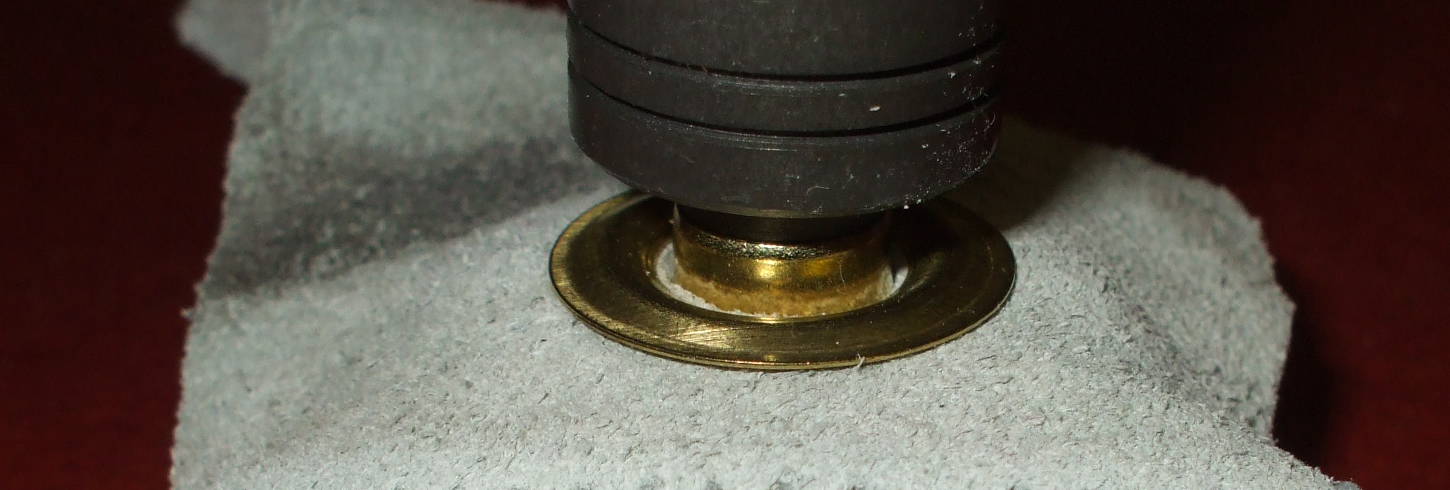
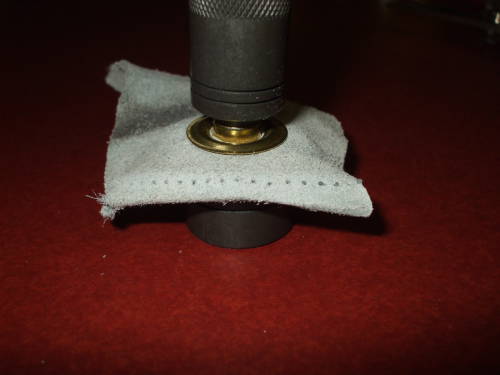
Place the forming punch onto the assembly. Its tapered nose will go down through the tubular center of the grommet body and into the anvil.
Drive the forming punch down onto the anvil with several blows with a hammer. Again, do this on a sturdy surface, not on a table or a counter top.
(Yes, I took these pictures on a counter top, but that was just for the photography. All hammering was done against the floor!
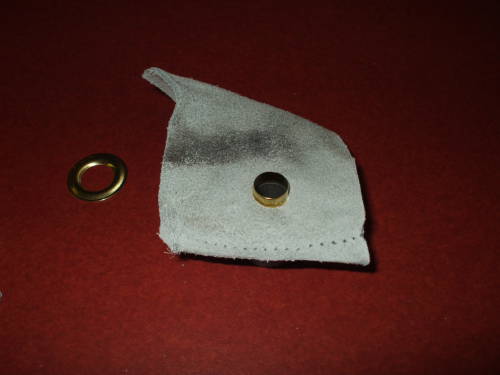
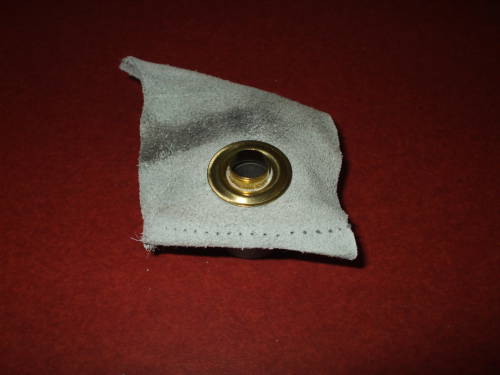
Here is the completed patch and grommet!
Now you need to sew the patch onto the drawstring sleeve.
For best strength, use dental floss!
For a more completely Russian approach, use a sewing kit from Hotel Intourist in Moscow.
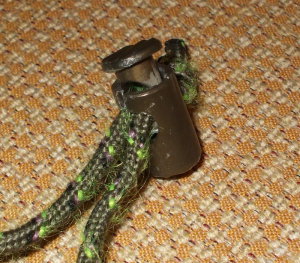
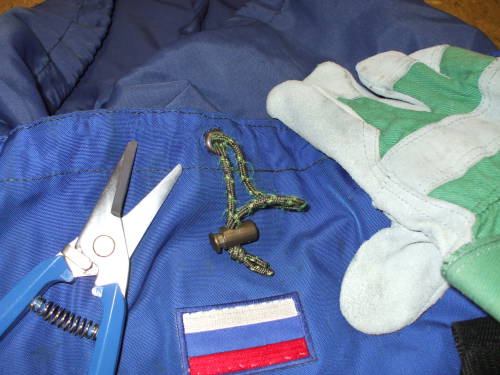
Remove the cord lock (or cord clamp, or whatever you call those spring loaded gadgets), carefully cut around the rim of the old grommet and remove it, and then pass the drawstrings through the grommet.

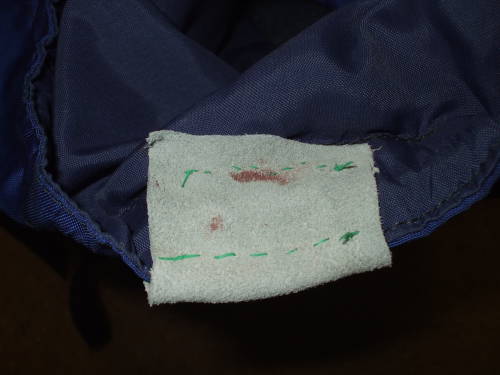
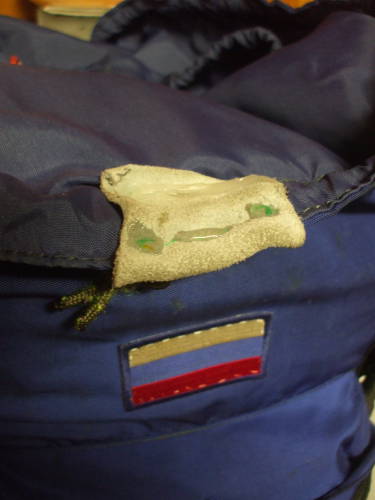
Make two lines of stitches parallel to the sides of the original drawstring sleeve.
Obviously, you can't sew across the ends as that would get in the way of the drawstring or even sew it into place.
It will be fairly difficult to push the needle through the two layers of leather. That's a good indication of the strength we're gaining, but it is a bother. I found that the thimbles supplied in a larger sewing kit seemed to be built for small children. So, pliers can be very helpful.
Watch out that you don't stick yourself too much while doing this. Yes, those are blood stains.
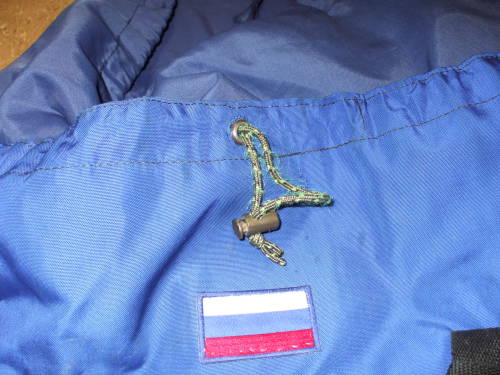
Here is the grommet side once the stitching is complete and the cord lock is back in place.
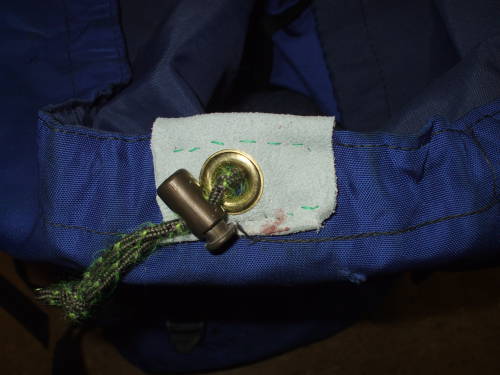
I mixed up some epoxy and placed a few drops on the stitching. My main goal was to encase the knots at the ends.
Do this as a series of small dots of epoxy!
If you run a bead of epoxy along the stitching, it will break into many small pieces and flake off when the leather is bent. You want little balls of epoxy that do not try to bend, with the patch bending between them.
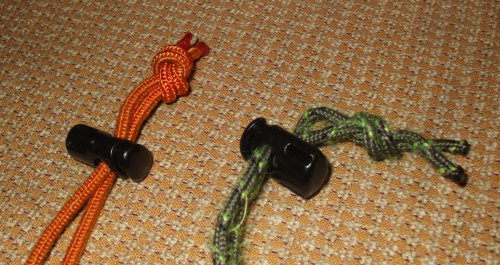
And, of course, it's just one thing after another. Soon after that repair, one of the original plastic cord locks finally broke.
That's a cheap and easy repair, you can buy them at an outdoor supply place for maybe US$ 0.50 to 0.75.